You will find those commands and tips that I need from time to time (and usually
forget when I need them). This is a page to complement
my clone at parsiya.io and gives me a simple repository of
how-tos I can access online. Look at the table of contents below or ctrl+f and
search for keywords.
Tar
Insert XKCD 1168, hur dur!
Compress a Directory Using tar
tar -zcvf target_tar.tar.gz directory_to_be_compressed
Decompress a tar.gz file
tar -zxvf target_tar.tar.gz -C path/to/decompress/
OpenSSL
Dump The TLS Certificate of a Domain with OpenSSL
echo | openssl s_client -connect HOST:PORT 2>/dev/null | openssl x509 -text -noout
TLS Connection with a Specific Ciphersuite with OpenSSL
openssl s_client -connect HOST:PORT -cipher cipher-name -brief
-brief: reduced outputcipher-name: A cipher from output ofopenssl cipherscommand
AWS
How to Use s3deploy
I have switched to s3deploy from s3cmd: https://github.com/bep/s3deploy.
Create a file named .s3deploy.yaml (note the period) in the root of website. I
have:
routes:
    - route: "^.+\\.(js|css|svg|ttf|eot|woff|woff2)$"
      #  cache static assets for 20 years
      headers:
         Cache-Control: "max-age=630720000, no-transform, public"
      gzip: true
    - route: "^.+\\.(png|jpg)$"
      headers:
         Cache-Control: "max-age=630720000, no-transform, public"
      gzip: true
    - route: "^.+\\.(html|xml|json|js)$"
      gzip: true
The file is self-explanatory. Don't set gzip for txt files,
it will break your keybase proof.
Then run (change the region if needed):
s3deploy -source=public/ -region=us-east-1 -bucket=[bucketname]
To pass your AWS key and secret, you can either set them in an environment variable or in this file:
c:/Users/[your user]/.aws/credentials
Like this:
[default]
aws_access_key_id=
aws_secret_access_key=
Sync a Directory with an Amazon S3 bucket with s3cmd
These might be updated because I do not use s3cmd anymore.
python s3cmd sync --acl-public --delete-removed --rr directory-to-sync/ s3://bucket-name
E.g., uploading the Hugo generated public directory to my website:\
python s3cmd sync --acl-public --delete-removed --rr public/ s3://parsiya.net
--acl-public: Anyone can only read.--delete-removed: Delete objects with no corresponding local files.
Change the MIME-Type of the CSS file After Upload to Fix CSS not Displaying Correctly
python s3cmd --acl-public --no-preserve --mime-type="text/css" put public/css/hugo-octopress.css s3://parsiya.net/css/hugo-octopress.css
| |
Set the Website Index to a Non-Root file in a Static Website on S3
When setting up a static website in an S3 bucket, you need to specify an index
and an error page. The index cannot be in a subdirectory but the error page
can. Set the index to a non-existent file (e.g. whatever.crap) and set the
error page to the actual index page. The browser will be redirected to the error
page:
If you are relying on error pages, this will mess with your site because every error will be redirected to the index. Another way is to set a meta redirect in the index file in the root directory and redirect to that page.
Use AWS CLI Without Credentials
Use --no-sign-request. E.g., to list all items in a world-readable bucket:
aws s3 ls s3://bucket-name --no-sign-request --recursive
Windows
Shortcut to IE (or WinINET) Proxy Settings
control inetcpl.cpl,,4
where.exe
where.exe searches for files. If no location is passed it searches in the
local directory and then in PATH.
/Rsearches recursively in a specific location./Tdisplays file size./?for help.
Delete File or Directory with a Path or Name Longer than the Windows Limit
mkdir empty_dir
robocopy empty_dir the_dir_to_delete /s /mir
rmdir empty_dir
rmdir the_dir_to_delete
- Source: http://superuser.com/a/467814
Exit Status 3221225781
TL;DR: exit status 3221225781 on Windows means a DLL is missing. In this
case, diff.exe was missing libintl3.dll and it made gorename stop working.
Get and install it from:
The Actual Problem:\
gorename stopped working and I got the following error in the VS Code console:
Rename failed: gorename: computing diff: exit status 3221225781 gorename:
    computing diff: exit status 3221225781 gorename: failed to rewrite 2 files
Searching for 3221225781 sent me to
Rust language issue 42744
which means a DLL is missing. Run where diff to find out where it is and it
was in \Go\bin\diff.exe. Running diff.exe manually got this prompt.
The code execution cannot proceed because libintl3.dll was not found.
Reinstalling the program may fix this problem.
Go to http://gnuwin32.sourceforge.net/packages.html and click on Setup in
front of DiffUtils. It will download a package which contains the utils and
two DLLs: libintl3.dll and libiconv2.dll. Copy all of them to where the
original diff.exe was and it should work.
Map a Drive to a Specific Directory
This is useful when you want to refer to a specific directory as a drive.
subst X: C:\path\to\source\code
Two problems:
- This is not persistent. To make it persistent, use the solutions here.
- It cannot be shared with docker. E.g., The drive is not shared when trying to share a directory with source code with docker for VS Code docker development.
We could use net use as follows but it does not show up in Docker's
settings > Shared Drives, either.
net use W: \\localhost\$c\path\to\source\code
To share a drive, create a VHD mount and share it instead.
Create a VHD and mount it:
Automount it at startup:
Prevent Monitors from Going to Sleep after Locking the Computer
After locking the computer the monitor might go to sleep. To disable:
- Open the following registry key:
HKEY_LOCAL_MACHINE\SYSTEM\CurrentControlSet\Control\Power\PowerSettings\ 7516b95f-f776-4464-8c53-06167f40cc99\8EC4B3A5-6868-48c2-BE75-4F3044BE88A7 - Look at the value
Attributesand change it from0x00000001to0x00000002. - Open the Control Panel (control.exe) and go to
Power Options. - Click
Change plan settingsin front of the selected power plan. - Click
Change advanced power settings. - Now under
Displaythere should be a new item:Console lock display off timeout. - Change this to whatever you want.
Convert a plist File to XML on Windows
plutil -convert xmlfile.xml com.apple.springboard.plist where:
plutilis installed with iTunes.plutilis inC:\Program Files\Common Files\Apple\Apple Application Support.Source: https://superuser.com/a/1264369
Oneliner to Find Unquoted Service Paths
wmic service get displayname,pathname|findstr /IV "C:\Windows"|findstr /IV """
Unquoted service paths are usually not exploitable. See my No, You Are Not Getting a CVE for That.
Run Chromium Browsers with a Proxy
Chromium uses the WinINET proxy settings. Instead of redirecting everything to the browser, we can set the proxy using the command line (also works for Chrome/Edge and other browsers built on Chromium but not Electron):
"C:\Program Files (x86)\Microsoft\Edge\Application\msedge.exe" --proxy-server="http://localhost:8080"
The following does the same but falls back to direct connect if the proxy is not available. Don't use this because you will not know if the fall back happens:
"C:\Program Files (x86)\Microsoft\Edge\Application\msedge.exe" --proxy-server="http://localhost:8080,direct://"
Microphone does not Work in Discord
You might have enabled the privacy settings in Windows 10.
- Settings.
- Search for Privacy.
Microphone privacy settings.- Allow apps to access your Microphone.
- Enable for
Win32WebViewHost. - ???
- Yell at
your raid groupDPS for standing in fire.
Extract MSI Files
Use the built-in msiexec tool.
msiexec /a c:\path\to\file.msi /qb TARGETDIR=C:\absolute\path\to\extract\directory- Path to the msi file (the first path) can be relative. The second one must be
absolute and does not accept
/as path separator. - The target directory must exist.
- If the path to the target directory (the second path) is not absolute, we
will get this error:
Could not access network location 'xxx'.
Disable Autofocus for Microsoft Lifecam Cinema
If the "Microsoft Lifecam Cinema" webcam constantly autofocuses on Windows 10.
- Open the Windows camera app.
- If the camera is already in-use (e.g., videoconferencing tool) turn it off in the other app.
- Click the middle icon from the three icons to the left.
- Drag the slider to make it manual focus.
You can also try in Skype which is where the old utility is accessible.
- Open Skype.
- Click on settings (gear to the right).
- Select "Video Device" in the left side bar.
- Select the "Microsoft LifeCam Cinema."
- Click on "Camera Settings" (this will open the old utility that went away).
- Click on the "Camera Control" tab and remove the "Auto" checkbox in front of focus.
- These are connected so if you have the camera app open and change the focus in Skype you can see the change immediately.
- The setting is lost after restart. Just opening the Camera app does the job.
Install WinDbg as the Post-Mortem Debugger
- Install WinDbg as part of the Windows 10 SDK.
- NYou do not need most of the stuff that the SDK installs. You will only
need to install
Debugging Tools for Windows.
- NYou do not need most of the stuff that the SDK installs. You will only
need to install
- Open an admin cmd and navigate to the following dir:
C:\Program Files (x86)\Windows Kits\10\Debuggers\
- Go into each of the x64 and x86 directories and run the following command:
windbg -I
- You should get a prompt that says WinDbg has been installed as the default post-mortem debugger.
Remove WinDbg as the Post-Mortem Debugger
Delete some registry keys.
- 64-bit version
- Go to
HKEY_LOCAL_MACHINE\SOFTWARE\Microsoft\Windows NT\CurrentVersion\AeDebug. - Remove the
Debuggerkey.
- Go to
- 32-bit version
- Go to
HKEY_LOCAL_MACHINE\SOFTWARE\WOW6432Node\Microsoft\Windows NT\CurrentVersion\AeDebug. - Remove the
Debuggerkey.
- Go to
Open a Network Monitor cap File in Wireshark and Save is Disabled
This happens in two instances:
- Not fixable: If the NetMon capture file contains IEEE 802.11 plus Network
Monitor radio header encapsulated packets instead of Per packet encapsulated
packets.
- Seems like this happens outside of VMs when we are capturing traffic for a wireless network interface.
- Fix below: If you save the display filter in the capture file. The filter
will be first packet in the resulting cap file and that's what causes this
issue.
- Do not check the
Record display filter in capture filewhen saving the file in Netmon.
- Do not check the
If you already have a file with the display filter you can remove it.
- Use the
netmon_filterin Wireshark. You will most likely see one packet. It's the first packet and its ID is 1. - Close it and use
editcapto remove it.C:\Program Files\Wireshark>editcap -F netmon2 C:\path\to\netmon.cap C:\path\to\modified.cap 1
- Open
modified.capin Wireshark and save it as pcap.
Keyboard Shortcut to Run Applications Elevated
For example, running notepad as admin.
- Open the start menu. E.g., Windows key.
- Type
notepad, now notepad is selected. - Alternatively, open the Run dialog with
Windows+Rand enternotepad. - Press
ctrl+shift+enter. - UAC pops up.
This also works if you select a shortcut and press ctrl+shift+enter.
Firewall Rules in the Registry
If you cannot delete firewall rules in the GUI, delete their corresponding rule in the registry (user rules are represented by a GUID). Also helps with reading the rules because the rule text might not say which executable is targeted:
Location:
Computer\HKEY_LOCAL_MACHINE\SYSTEM\CurrentControlSet\Services\SharedAccess\Parameters\FirewallPolicy\FirewallRules
Format:
Install Packages on Windows from the Command Line (Needs Admin)
To install telnet client in an admin command prompt:
pkgmgr /iu:"TelnetClient"
Uninstall IE 11 from Windows 7 (and Install an Older Version)
- Go to
Control Panel > Programs > Programs and features. - Select
Installed Updated. - Look for
Internet Explorer 11. - Right click and uninstall.
- Download older version of IE (e.g. IE 9) for Windows 7 and install it.
Read Scheduled Task's DACL
Find the task name in the PathToTask registry key and use it in the command:
$PathToTask = "HKLM:\SOFTWARE\Microsoft\Windows NT\CurrentVersion\Schedule\TaskCache\Tree\[replace with task]"
$SDBin =  ( (get-itemProperty $PathToTask).sd )

ConvertFrom-SddlString ([wmiclass]"Win32_SecurityDescriptorHelper").BinarySDToSDDL($SDBin).SDDL
- Source: https://serverfault.com/a/997929
Find Users Under the HKEY_USERS Registry Hive
HKEY_LOCAL_USER is a subset of HKEY_USERS for the current user. Under
HKEY_USERS we see a bunch of directories. To figure out the users for these
directories we need to see them in the following location:
Computer\HKEY_LOCAL_MACHINE\SOFTWARE\Microsoft\Windows NT\CurrentVersion\ProfileList\
For example, I have HKEY_USERS\S-1-5-21-2868049494-289672223-1164028246-1001
in a VM. So I go to
Computer\HKEY_LOCAL_MACHINE\SOFTWARE\Microsoft\Windows NT\CurrentVersion\ProfileList\S-1-5-21-2868049494-289672223-1164028246-1001
and look under the ProfileImagePath key to see which user it is.
Find The Open Handle to a File or Resource
- Open
Resource Monitor. CPUtab.Associated Handlessection > enter the name of the file/resource in the search field. Look at the source for a screenshot.- Kill the process using t he handle.
- Source: https://superuser.com/a/643312
powercfg
powercfg /requests- See which programs have requested to keep the device display active.
- Source: https://textslashplain.com/2020/10/05/images-keeping-you-awake/
powercfg /sleepstudy- Generates a fancy HTML page.
- Source: Matt Thomlinson.
Add "Edit" to the Context Menu for Images in Windows 11
- Run
regedit. - Go to
Computer\HKEY_CLASSES_ROOT\SystemFileAssociations\image\shell. - Create a key named
edit. - Create a key named
commandinsideedit. - Modify the value of the
(Default)value ineditand change it to:"C:\Users\[username]\AppData\Local\Microsoft\WindowsApps\mspaint.exe" "%1"
Unfortunately, "%LocalAppData%\Microsoft\WindowsApps\mspaint.exe" "%1" doesn't
work here.
Source: https://superuser.com/a/1707163
WSL
See current distributions and their version: wsl -l -v.
Set the default version to 2 for all new distributions:
wsl --set-default-version 2
Convert a distro (e.g., Ubuntu-18.04) to version 2:
wsl --set-version Ubuntu-18.04 2
Moving to WSL2 will prevent your machine from talking to the internet with some VPN software and if you are connected to the VPN. WSL2 uses Hyper-V. Hyper-V VMs usually do not have network connectivity on VPN.
File locations
%LocalAppData%/packages/{full-distro-name}/LocalStatewherefull-distro-nameis:- Ubuntu 18:
CanonicalGroupLimited.Ubuntu18.04onWindows_79rhkp1fndgsc - Debian:
TheDebianProject.DebianGNULinux_76v4gfsz19hv4
- Ubuntu 18:
Access WSL2 Files
In WSL1, a file in the distro is a separate file on disk. In WSL2 we have a
ext4.vhdx file. WSL 2 uses a fully managed VM. Hence, why WSL1 has better
performance on Windows files.
Individual files on WSL2 are at \\wsl$\{distro} where distro comes from
wsl -l -v. E.g., Debian.
Import and Export
If working with Debian.
# run all on Windows

# stop the distro
$ wsl --terminate Debian

# export
wsl --export Debian C:/path/to/debian.tar
Now, we can import it as another distro. We can have multiple instances of the same distro:
wsl --import NewDebian C:/path/to/newdebian/ C:/path/to/debian.tar
Note: If you import a distro like this, the ext4.vhdx file will be in
C:/path/to/newdebian/ and not in
%LocalAppData%/packages/{full-distro-name}/LocalState.
We can also import the file in place.
wsl --import-in-place NewDebian C:/path/to/debian.tar
Use WSL Distributions without the Microsoft Store
First we need to download a distribution. Use the instructions in the link below
to get a distro.appx file.
Install the package (more details in the previous link):
Add-AppxPackage .\distro.appx.- Then double-click
distro.appxto start. This is important.
We can also get the file system as a file to use with --import.
This appx files are just zip. We can easily extract them.
- Rename it to zip (instructions are in PowerShell):
Rename-Item .\distro.appx .\distro.zip
- Extract the archive:
Expand-Archive .\distro.zip .\distro
Now inside we have a bunch of appx files. E.g., the two big ones for Ubuntu
20.04 are Ubuntu_2004.2021.825.0_ARM64.appx and Ubuntu_2004.2021.825.0_x64.appx
 Inside ubuntu2024.appx
We can rename and extract the x64 file as we've seen before. Inside, we will
see install.tar.gz.
 install.tar.gz inside Ubuntu.._X64.appx
Unfortunately, wsl --import needs a tar file of the filesystem and doesn't
accept tgz. We have to decompress this file. You would think the tar utility
would have such an option, but it doesn't. It can extract the whole thing.
We could use an external utlity like gunzip, gzip, 7-zip, or some random PowerShell script. Considering tar is included in Windows, the path of least resistance is extracting everything and putting it back together. That is a good chunk of extra read/writes.
tar -zxvf install.tar.gz -C install
tar -cvf ubuntu2024.tar install/
# delete install
rm install # assuming we're in PowerShell
Now we can use wsl --import.
wsl --import NewUbuntu c:/path/to/VMs/ ubuntu2024.tar
You can import it in place if you don't want to make a copy.
wsl --import-in-place NewUbuntu ubuntu2024.tar
Hugo Server doesn't see File Notifications Events in WSL2
Solution: Move the files to the Linux filesystem from Windows.
More info: https://parsiya.io/random/wsl2-hugo-watch/
Docker in WSL2
- Start with https://docs.docker.com/desktop/windows/wsl/
- Install Docker Desktop for Windows.
Settings (gear icon) > Use the WSL2 based engine(was checked by default for me).Settings > Resources (side bar) > Enable integration with additional distrosand select any other distro.sudo usermod -aG docker $USER.- ???
- Logout and login.
Use Windows Copilot Plugins/Agents/Skills in WSL2
Symlinking ~/.copilot/ in WSL to the Windows location does NOT work for
plugin skills. config.json stores absolute Windows paths (C:\Users\...)
for plugin cache_path. The Linux CLI reads config.json via the symlink,
sees plugins in /plugin list, but can't load skills because the paths
don't resolve on Linux.
Use Copilot CLI on Windows for plugins. The Linux CLI works for basic Copilot usage but won't discover plugin skills.
What I tried and didn't work:
Symlink ~/.copilot/ in WSL2 to the Windows location via /mnt/c/ and start a
new Copilot session. Installation and everything else should still be done on
the Windows side, but you can use them in WSL.
# Remove existing directory if present
mv ~/.copilot ~/.copilot.bak

# Create symlink to Windows path
ln -s /mnt/c/Users/<user>/.copilot ~/.copilot
PowerShell
List All Files (Including Hidden Files)
Get-ChildItem "searchterm" -recurse -force -path c:\ | select-object FullName
-recurse: recursive. Loops through all directories-force: list hidden files.select-object: Selects each file from last pointFullName: Only display file name
Diff in PowerShell
Compare-Object (Get-Content new1.txt) (Get-Content new2.txt) | Format-List >> Diff-Output
Output will be in format of
InputObject:c:\users\username\somefile-- line contentSideIndicator:=>-- exists in new2.txt (second file, file to the right)
Pseudo-grep in PowerShell
Alternatively, use ripgrep like rg -i 'whatever'.
In PowerShell:
findstr "something" *.txt will include filename and line (no number AFAIK).
findstr /spin /c:"keyword" *.*
- /s: recursive - will search through the current directory and all sub-directories.
- /p: skip binary files (or files with characters that cannot be printed).
- /i: case-insensitive - remove if you want case sensitive search.
- /n: print line number.
If you want to search for different keywords (with OR) remove the /c:
findstr /spin "keyword1 keyword2" *.*
will search for keyword1 OR keyword2 in files
grep in Command Results
whatever.exe | Select-String -pattern "admin"
Get-Acl and icacls.exe
Get-Acl -path c:\windows\whatever.exe | Format-List
icacls.exe c:\windows\whatever.exe
time in PowerShell
Measure-Command {python whatever.py}
VHD File is Open in System (and Cannot be Deleted)
You clicked on a VHD file and now cannot delete it. Use this PowerShell command to dismount it. The path to the VHD should be absolute.
Dismount-DiskImage -ImagePath 'C:\full\path\to\whatever.vhd'
Base64 Encode and Decode without PowerShell
Use certutil for bootleg base64 encoding/decoding:
certutil -encode whatever.exe whatever.base64certutil -decode whetever.base64 whatever.exe
Load a Managed DLL from PowerShell
Zip a Directory with PowerShell
Compress-Archive -Path C:\path\to\folder\ -DestinationPath c:\path\to\destination\archive
Note the destination file will be archive.zip but we don't need to provide the
extension in the command.
- Source: https://docs.microsoft.com/en-us/powershell/module/microsoft.powershell.archive/compress-archive
Hyper-V
Switching from VirtualBox for Hyper-V had its own set of tradeoffs.
Cannot Create Virtual Switch
When creating a Virtual Switch in Hyper-V you get an error along the lines of "failed adding ports to the switch" and "a parameter passed was invalid."
- Open an admin command prompt and run
netcfg -d. - Restart the host machine.
Cloning VMs in Hyper-V
You cannot clone VMs in Hyper-V like VirtualBox. Create a copy of the vhd(x) hard disk and use it in a new VM. Yes, it's as manual as it sounds.
The Guest Has No Internet
The internet recommends creating an external virtual switch but it did not work for me. I deleted the external switch and used the default switch and it somehow worked so try doing that.
This also happens if you are using an active VPN connection on the host.
Higher Resolution For Debian/Ubuntu Guest in Hyper-V
Seems like the highest resolution is 1080p.
sudo nano /etc/default/grub.- Change the line with
GRUB_CMDLINE_LINUX_DEFAULTtoGRUB_CMDLINE_LINUX_DEFAULT="quiet splash video=hyperv_fb:1920x1080"
sudo update-grub.- Restart the VM.
- Source: https://askubuntu.com/a/745142
Creating an Ubuntu VM in Hyper-V
Most important item, do not select log in automatically during setup.
Otherwise, xRDP will fail silently.
Windows DNS Cache is not Getting Populated in Hyper-V Guest
In a default Hyper-V guest networking setup the local DNS resolver cache is empty.
- Symptom:
ipconfig /displaydnsprints nothing. - Solution: Modify the DNS server for the network adapter and manually add a DNS
server like
8.8.8.8or1.1.1.1.
VirtualBox
Restart Clipboard Functionality in VirtualBox After Guest Resume
Sometimes disabling and enabling the clipboard in VirtualBox menu works.
Or in the Windows guest:
- Kill
VBoxTray.exein task manager. - Start
VBoxTray.exeagain.
- Source: https://superuser.com/a/691337
Change the Hardware UUID of Cloned Windows VMs to Avoid Windows Reactivation
You cloned a Windows VirtualBox VM and now you have to activate it again. This script changes the hardware UUID of the cloned machine to the old one. No reactivation needed.
$ORIGVirtualMachineName="Windows 10 - Base"   # Old VM name as it appears in VirtualBox
$clonedVirtualMachineName="Win10Clone"        # New VM name
$vboxDir="c:\Program Files\Oracle\VirtualBox" # Directory containing VBoxManage
cd $vboxDir
$uid=$($($(.\VBoxManage.exe showvminfo $ORIGVirtualMachineName|select-string "Hardware UUID:").ToString()).Split())[4]
.\VBoxManage modifyvm $clonedVirtualMachineName --hardwareuuid $uid
Increase VM Disk Size
The default modern.ie VMs come with a 40GB vmdk hard drive and I want to resize them to 100GB (because videogames are huge). VirtualBox cannot resize it. We can clone it to vdi, resize it and convert it back to vdmk.
VBoxManage is at c:\Program Files\Oracle\VirtualBox (default installation).
- Convert vmdk hard disk to vdi:
VBoxManage clonemedium "MSEdge - Win10.vmdk" "MSEdge - Win10.vdi" --format vdi
- Resize vdi.
VBoxManage modifymedium "MSEdge - Win10.vdi" --resize 102400
- Convert vdi back to vdmk (I usually just keep it as vdi).
VBoxManage clonemedium "MSEdge - Win10.vdi" "MSEdge - Win10-resized.vdi" --format vmdk
- Extend the original partition in guest with
Disk Management(Windows).- Run
diskmgmt.msc. - Click on the existing partition and select
Extend. - Use the wizard and add the new empty space to the origin partition.
- Run
- Delete unused vdi or vmdk files.
- ???
- Enjoy 100 GBs of space. Well, 83GB on a default Win10 x64 install.
Git
I know a total of 5-6 git commands.
Create New Branch and Merge
This works with small branches (e.g. one fix or so). Adapted from a Bitbucket tutorial.
Create a new branch and checkout -
git checkout -b fix-whatever\ This will create a branch of your current one so make sure you are creating a branch from the branch you want. This is the same asgit branch whateverandgit checkout whatever.Make changes and commit -
git add - git commit\ Make any changes you want to do, then stage and commit.Push the branch to the remote repo [optional] -
git push\ This can be safely done because it's an obscure branch and no one else cares about it.Switch to the original branch to merge -
git checkout master\ The branch from step one.Merge the branches -
git merge fix-whatever.\ Alternatively, squash all commits into onegit merge --squash fix-whateverand thengit commit -m "One message for all commits in merge".Delete the branch -
git branch -d fix-whatever\ We don't need it anymore. If it was pushed to remote, then we need to delete it there too.
Only Clone a Certain Branch
git clone -b <branch> <repo>
Clone and Populate Submodules
git clone --recurse-submodules <repo>
Undo Remote git History after Push
Because this keeps happening to me.
Reset the head in local repo N commits back. -
git reset HEAD~N\ Where N is the number of commits that you want to revert.Make changes and stage them -
git addCommit the changes -
git commitForce push the local repo to remote -
git push -f\ Note: This will force the update and erase the commit history online. I only do it for my solo repositories.
Sync a Fork with the Original Repository
You have forked a repository a while ago. You want to sync the new changes.
- Add the original repository as
upstream.git remote add upstream git@github.com:original-user/original-repo.gitgit remote add upstream https://github.com/original-user/original-repo/- Check with
git remote -v
git fetch upstream- Merge the
upstream/mainbranch into the localmainbranch:git merge upstream/main
- Source: GitHub documentation.
Use Notepad++ as git Editor on Windows via Cygwin
Create a file called npp with the following content and copy it to
cygwin\bin. Modify the path of notepad++ to point to your installation.
'C:/Program Files (x86)/Notepad++/notepad++.exe' -multiInst -notabbar -nosession -noPlugin "$(cygpath -w "$*")"
Run the following command in Cygwin to set it as the global git editor:
git config --global core.editor npp
Change Remote for an Existing Git Repository
For example, moving repository from Bitbucket to GitHub or back.
git remote set-url origin git@github.com:parsiya/repository.git
List All Authors in a Git Repository
I wanted to see if I was still showing up as root in old commits.
git shortlog -s | cut -c8-
Rewrite Author for Older Commits
parsiya.net had commits as root from when I was using it offline. I wanted
to change everything to my own username.
- If you want to start at root -
git rebase -i --root - If you want to start from commit AAAA -
git rebase -i AAAA - Change
picktoeditfor every commit with the old author and save. Rebase starts and pauses at every commit withedit. - Change the author: \
git commit --amend --author="Author Name <email@address.com>" - Continue the rebase -
git rebase --continue - Rinse and repeat.
Remove Uncommitted Files from Staging
You have added files with git add but have not committed them and want to
remove some (not all) instead of git reset.
git reset HEAD -- file/directory
Make git Case Sensitive (with a Catch)
In a case-insensitive file system (Windows, Mac), git is case-insensitive by
default. So if you rename Bob.jpg to bob.jpg after it has already been
pushed, git doesn't change it because from a file-system perspective it's the
same file (although Windows shows the filename in lowercase).
To make git case sensitive on such an OS (Windows, OSX):
git config core.ignorecase false
NOTE: This introduces its own problems. Let's assume you have already
committed Bob.jpg and make git be case-sensitive. You rename it to bob.jpg
and push it. In the remote repo you will have two files Bob.jpg and bob.jpg.
The answer is to rename Bob.jpg to something else like Bob-1.jpg, push and
then rename it back to bob.jpg.
Exclude a Committed File with gitignore
.gitignore only works on new git adds. If we have already pushed
blah/whatever.cpp to the repo, adding whatever.cpp to .gitignore does
nothing.
Do this first and then gitignore will work (not using --cached will remove
the file completely from the filesystem):
git rm --cached blah/whatever.cppUse
-rfor recursive change. Needed for directories.
Note: Also overwrite history if the file had secrets/sensitive info.
Sign git Commits
This is for GitHub, but should work for everywhere.
- Generate a new ed25519 SSH key. You can reuse the one used for connection.
ssh-keygen -t ed25519 -C "[github-username]@users.noreply.github.com"
- Upload it to your Git server. For GitHub, go to https://github.com/settings/ssh/new.
- Key type:
Signing key. - Paste the public key. It should be in
~/.ssh/whatever.pub.
- Key type:
- Set the signing format to SSH.
git config --global gpg.format ssh
- Tell git to use the local public key:
git config --global user.signingkey ~/.ssh/whatever.pub
- Tell git to sign every commit:
git config --global commit.gpgsign true
Git Submodule: HTTPS for Everyone, SSH for You
When adding a public repo as a submodule, use the HTTPS URL so anyone can clone without authentication:
git submodule add https://github.com/user/repo.git path/to/submodule
If you need SSH locally (e.g., for pushing), override the URL in your local
.git/config without changing the shared .gitmodules:
git config submodule.path/to/submodule.url git@github.com:user/repo.git
This way .gitmodules keeps the HTTPS URL for everyone else, and your machine
uses SSH.
Visual Studio Code
My current (as of June 2019) editor of choice. Settings are at https://parsiya.io/categories/configs/vscode/.
Associate an Extension with a Specific Language
This allows us to have specific language highlighting for custom extensions. Add
the following to settings.json:
    "files.associations": {
        "*.whatever": "cpp",
        "*.generics": "go"  // lol
    }
Install a Specific Version of an Extension
This also disables auto-update for that extension so you can keep an older version of an extension.
- Open the extensions tab.
- Right-click on the extension.
- Select
Install Another Version.... - Select the version.
- The extension will not auto-update.
couldn't start client gopls unsupported URI scheme
VS Code needs to open a workspace. Open the parent directory to the project.
Source: https://www.reddit.com/r/golang/comments/g6l6y9/couldnt_start_client_gopls_unsupported_uri_scheme/
Sublime Text 3
Tips for using the Sublime Text 3 editor. I don't use Sublime Text anymore although I bought it. This section is probably outdated.
Fix "MarGo build failed" for GoSublime on Windows
GoSublime's executable has Go version in it. In most cases, it cannot grab the version on Windows and the build will fail like this:
MarGo: MarGo build failed
cmd: `['C:\\Go\\bin\\go.exe', 'build', '-tags', '', '-v', '-o',
       'gosublime.margo_r17.12.17-1_go?.exe', 'gosublime/cmd/margo']`
Where ? is the Go version that is unknown.
Edit this file:
%AppData%\Sublime Text 3\Packages\GoSublime\gosubl\sh.py
Find these lines:
cmd = ShellCommand('go run sh-bootstrap.go')
cmd.wd = gs.dist_path('gosubl')
cr = cmd.run()
raw_ver = ''
ver = ''     # Change this to '1'
Edit ver to whatever, I usually do 1. Restart Sublime Text and MarGo will
build.
This must to be done for every new GoSublime version.
Open the Same File in a New Tab
File > New view into File. Then drag the pane to a second screen/location.
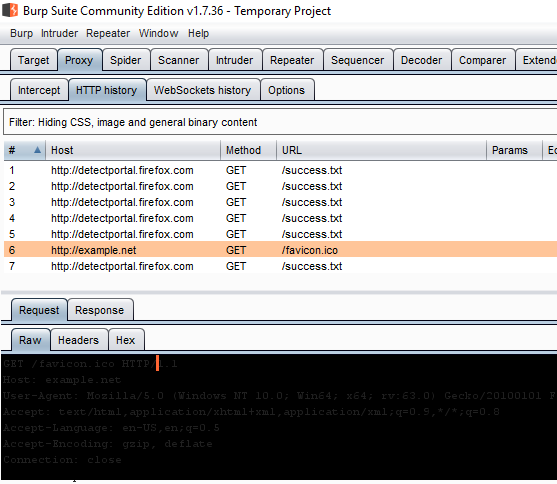
Burp
Quality of Life Tips and Tricks for Burp
- See my blog post: Quality of Life Tips and Tricks - Burp Suite
Selected Text in Burp is Black
Usually happens in Virtual Box.
Two options:
- Disable 3D rendering in Virtual Box. Not recommended.
- Run Burp with 3D disabled (make a shortcut): \
java.exe "-Dsun.java2d.d3d=false" -jar burp.jar
- The complete command for the default install on Windows is:
"C:\Program Files\BurpSuiteCommunity\jre\bin\java.exe"
  "-Dsun.java2d.d3d=false"
  -jar "C:\Program Files\BurpSuiteCommunity\burpsuite_community.jar"
Source - credit to floyd:
Using iptables to Proxy Android Apps with Burp
Technically this should work with any proxy.
- Add Burp's CA certificate to the device.
- If there's certificate pinning, bypass it.
- Enable invisible proxying for the target listener.
- Root the device, iptables needs root.
For example, we want to redirect all traffic to 443 and 80 to Burp's
listener at 192.168.137.1:8080. This is the default IP address of a Windows
machine if the mobile hotspot network is enabled:
iptables -t nat -A OUTPUT -p tcp --dport 443 -j DNAT --to-destination 192.168.137.1:8080
iptables -t nat -A OUTPUT -p tcp --dport 80 -j DNAT --to-destination 192.168.137.1:8080

iptables -t nat -A POSTROUTING -p tcp --dport 80 -j MASQUERADE
iptables -t nat -A POSTROUTING -p tcp --dport 443 -j MASQUERADE
- Source: http://blog.dornea.nu/2014/12/02/howto-proxy-non-proxy-aware-android-applications-through-burp/
Linux
I'd just like to interject for a moment. What you're referring to as Linux, is in fact, GNU/Linux, or as I've recently taken to calling it, GNU plus Linux.
Python Module Installed with pip but Command is not Available
They are installed in ~/.local/bin. Add it to your $PATH.
Add a User to sudoers on Debian
su -: If you dosualone, you might not findusermodin your path.- "Starting su with the option " -" gives you the full path root would have when logging in to the system after startup. So directories like /usr/sbin, /sbin or /opt/kde/bin become part of roots path variable after doing su and will be searched for commands." source
usermod -aG sudo user-name- Restart (or logoff and login?).
grep
Only search in files with specific extensions. E.g., only md/markdown.
grep -ir "whatever" --include\*.md --include \*.markdown
Docker
Commands
- Images:
- All images:
docker images - Delete image(s):
docker rmi img1 img2- By name:
docker rmi whatever/blah - By ID:
docker rmi f20d
- By name:
- Build image from file:
docker build . -f file -t whatever/blahDockerFileit does not need to be mentioned.docker build -t whatever/blahdocker imageshould display the image now.
- All images:
- Containers:
- All running containers:
docker container ls -a-docker ps -a - Only show running containers:
docker ps - Stop one container:
docker stop d194 3f4a - Stop all containers:
- PowerShell:
docker ps -a -q | ForEach { docker stop $_ } - Bash:
docker stop $(docker ps -a -q)
- PowerShell:
- Delete container(s):
docker container rm d194 3f4a - Run a container from an image:
docker run -it whatever/blah [command]where command is usually/bin/bash.--rmto delete the container after it exits. This is useful when testing.
- All running containers:
- centOS specific:
- centOS cmd for
DockerFile:CMD ["/usr/sbin/init"] - Create and run a centOS container:
docker run -it whatever/blah sh
- centOS cmd for
Troubleshooting
- Error starting userland proxy: mkdir ... : input/output error.
- Restart docker. On Windows, right click the docker tray icon and select
Restart....
- Restart docker. On Windows, right click the docker tray icon and select
Python
These were written when I used Python 2, some might not work with newer versions.
Create All Possible Combinations of Two Lists of Strings
from itertools import product

if __name__ == "__main__":
    set1 = ["https://example.net", "https://google.com"]
    set2 = ["/whatever", "/something"]

for e1, e2 in product(set1, set2):
    print(e1+e2)
Multi-line String
Note the space on second line.
string1 = "This is line one of the string that is going to be over 80"
          " characters and thus needs to be broken into two or more lines."
Main
Because I always forget.
def main():
    # whatever

if __name__ == "__main__":
    main()
Format String with
"{}*{} = {}".format(x, y, x*y)
bytearray
With Python 3, it's not that useful but still:
Cyclic XOR on bytearrays
import itertools

def xor_byte(payload, key):
    """
    Get a bytearray, XOR it with a key (bytearray) and repeat the key
    Return bytearray
    """
    return bytearray((mybyte ^ keybyte) for (mybyte, keybyte) in
                     itertools.izip(payload, itertools.cycle(key)))
Cyclic XOR on Strings
Same as above but string
import itertools

def xor_str(payload, key):
    """
    Get a string, XOR it with a key (string) and repeat the key
    Return string
    """
    return "".join(chr(ord(mybyte) ^ ord(keybyte)) for (mybyte, keybyte) in
                   itertools.izip(payload, itertools.cycle(key)))
Python One-Liners in Command Line
You can run Python one-liners from command line using python-c "command".
Separate command with ; and use ' for strings. Remember that you need to
import things too.
For example a one-liner to encode something in base64:
python -c "from base64 import b64encode; print b64encode('HelloHello');"
More:
# Decrypt from AES (you need pyCrypto)
python -c "from Crypto.Cipher import AES; aes = AES.new(KEY, AES.MODE_ECB); print aes.decrypt(CIPHERTEXT));"
Java
Enable Log4j for a Java App
This usually happens when I am testing a Java app and it uses log4j but
logging is not enabled.
Create a file named log4j.properties by the main jar file and put the
following in it. Add -Dlog4j.debug to the app's command line parameters.
The app might already have the command to log but is just missing the file. Use
procmon to see which paths are searched to find this file.
The Result is NAME NOT FOUND filter is your friend.
log4j.rootLogger=debug, stdout, R

log4j.appender.stdout=org.apache.log4j.ConsoleAppender
log4j.appender.stdout.layout=org.apache.log4j.PatternLayout

# Pattern to output the caller's file name and line number.
log4j.appender.stdout.layout.ConversionPattern=%5p [%t] (%F:%L) - %m%n

log4j.appender.R=org.apache.log4j.RollingFileAppender
log4j.appender.R.File=example.log

log4j.appender.R.MaxFileSize=100KB
# Keep one backup file
log4j.appender.R.MaxBackupIndex=1

log4j.appender.R.layout=org.apache.log4j.PatternLayout
log4j.appender.R.layout.ConversionPattern=%p %t %c - %m%n
Angular
Find the Version of Angular on a Website with DevTools
Run in the console getAllAngularRootElements()[0].attributes["ng-version"];.
Misc
Download Youtube Videos with Subtitles with youtube-dl
I love Wuxia (Chinese martial arts if I am not mistaken) series and movies. The
following youtube-dl command will
download the 56 episode HQ quality Chinese TV series called Xiao Ao Jiang Hu
or Laughing in the Wind (also called The Smiling Proud Wanderer or
Swordsman).
youtube-dl --ignore-errors --write-srt --sub-lang en --yes-playlist 'https://www.youtube.com/playlist?list=PLuGy72vdo4_ScwTYb1bAynhBs3KgowvvQ'
--ignore-errors: continue after errors
--write-srt    : download substitles
--sub-lang     : subtitle language (in this case English)
--yes-playlist : link to a Youtube playlist
Youtube-dl can be downloaded using pip. For example on Windows:\
python -m pip install youtube-dl.
It's also possible to download binaries from https://github.com/ytdl-org/youtube-dl/releases.
Sometimes, you need to pass --no-check-certificate to bypass certificate
errors.
Download Different Qualities with youtube-dl
youtube-dl -F https://www.youtube.com/watch?v=xKYIde5jh_8 will show use a list
of resolutions. The first column will be the format code which is a number.
$ youtube-dl -F https://www.youtube.com/watch?v=xKYIde5jh_8
...
format code  extension  resolution note
249          webm       audio only tiny   48k # note removed for most lines
...
247          webm       1280x720   720p  361k
136          mp4        1280x720   720p  482k
18           mp4        640x360    360p  282k
22           mp4        1280x720   720p  611k , avc1.64001F, 30fps, mp4a.40.2 (44100Hz) (best)
Then, we can download that format code (or best):
- 247:
youtube-dl -f 247 https://www.youtube.com/watch?v=xKYIde5jh_8 - 22 or best:
youtube-dl -f best https://www.youtube.com/watch?v=xKYIde5jh_8
Print Envelopes with Brother printers and LibreOffice
I gave away the DW2280 printer when I moved to Canada but I am keeping the instructions just in case. Before printing, get to printer physically and use the following instructions:
- DW2280: http://support.brother.com/g/b/faqend.aspx?c=gb&lang=en&prod=hl2170w_all&faqid=faq00000063_025
- DCP-7030: https://www.youtube.com/watch?v=6JEZYM5aLY8
- Open the back.
- Press the two green handles down.
- Don't need to do this for the DCP-7030 printer.
- Open manual feed in front.
- Adjust the paper guide and put the envelope in.
- Envelope orientation:
- The side that will be printed should be up.
- The opening slot should be to the left.
- Insert it until the printer says
Please Waitand grabs the paper.
addressee side should be up
opening is to the left and under

this side goes into the printer
                ^
                |
                |
        +----------------+
        |x               |
under   | x              |
 <------+- x             |
        |   x            |
        |   x            |
        |   x            |
        |   x            |
        |   x            |
        |   x            |
        |   x            |
        |   x            |
        |   x            |
        |   x            |
        |   x            |
        |   x            |
        |   x            |
        |   x            |
        |   x            |
        |  x             |
        | x              |
        |x               |
        +----------------+
Now open LibreOffice and use these instructions:
- Create new document in LibreOffice Writer (Word).
Insert > Envelope.- Enter destination in
Addressee. - Check
Senderand enter your own address in the bottom textbox. - Select
Printertab. - Select printer and press
Setup. - Select the Brother printer and press
Properties. - Click on the
Advancedbutton.- Paper Size:
Com-10orEnvelope #10. - Click OK and go back to properties.
- Paper Size:
- Select the
Paper/Quality(tab)- Media Type:
Envelope. - Paper Source > First Page:
Manual.
- Media Type:
- Press the
Insertbutton. - Save the document and print. Note the envelope orientation above.
Tab Size 4 in the GitHub Web Interface
Add ?ts=4 to end of the file URL.
ffmpeg
To split a file with ffmpeg. Let's say we want to grab the first 200 seconds
of a file starting from second 100.
ffmpeg -i input.mp4 -strict -2 -ss 100 -t 200 output.mp4
I also use it to reduce the file size of my video proof-of-concepts:
- Record the video with OBS Studio. The output file is
video.mkv. - Use OBS Studio to remux the video
File (menu) > Remux Recordingsto getvideo.mp4. - Use
ffmpegto reduce the file size:ffmpeg -strict -2 -ss 0 video-processed.mp4 -i video.mp4.
I still need to experiment with different codecs to figure out which one is best but this method reduces the file size dramatically without a noticeable change in quality.
Wrap Long Lines in Page Source in Firefox
Easier method: In the View Source page, right-click and select
Wrap Long Lines, or:
about:config- Set
view_source.wrap_long_linestotrue.
Wireshark Not Equal Filter
- Right:
!tcp.port == 8080 - Wrong:
tcp.port != 8080
Source: https://thetechl33t.com/2015/06/01/wireshark-not-equal-to-filter/
Copy Ebooks to iPad with Calibre
I use an old iPad Mini for reading ebooks. The default way of copying them from Calibre doesn't work because the iOS version is so old that the Calibre Companion app doesn't support it.
Using the web content server and going to http://your-pc-ip:8080 also doesn't
work because the Safari version so old that it doesn't support some of the new
JavaScript functions. None of the modern browsers also support that iOS version.
Solution: http://your-pc-ip:8080/mobile is the non-JS version and works. I have
to click each book separately and open it in iBooks, but better than nothing.
Regex
Regex to Search for URLs in Burp Responses
Not the best regex but does the job:
http([^"])*\.([^"])+
Better but more expensive regex:
/(?:(?:https?|ftp|file):\/\/|www\.|ftp\.)
    (?:\([-A-Z0-9+&@#\/%=~_|$?!:,.]*\)|[-A-Z0-9+&@#\/%=~_|$?!:,.])*
    (?:\([-A-Z0-9+&@#\/%=~_|$?!:,.]*\)|[A-Z0-9+&@#\/%=~_|$])
Bash
Bash Function to Change to a Directory and Open it in VS Code
I store all my dev work in ~/dev. Added this function to ~/.profile along
with cd dev. Then just after opening a session, I can do zz [directory] to
start working on it. Also supports autocomplete in directory name.
# bash function to navigate to a directory and open it in code.
function zz() {
    cd $1
    code .
    return 0
}

# go to dev
cd dev